Utter Integration API & Webhook Management Guide
Welcome to Utter. This guide explains how to access API & Webhook Management, generate and manage API keys, and start configuring webhooks to receive notifications from Utter.
Every step below includes the relevant screen so you can easily follow the process.
Step 1 — Access Integration
From the top navigation menu, open Manage and select Integration.
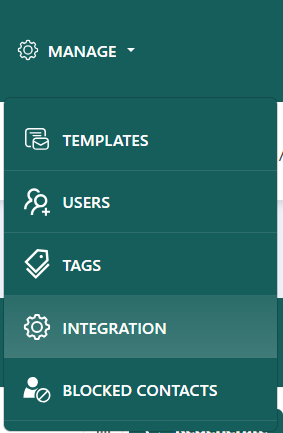
The Integrations page provides the following options:
- WhatsApp Website Widget
- API Keys Management
For API and webhook management, select API Keys Management.
Step 2 — Open API Keys Management
On the API & Webhook Management page, select the APIs tab.
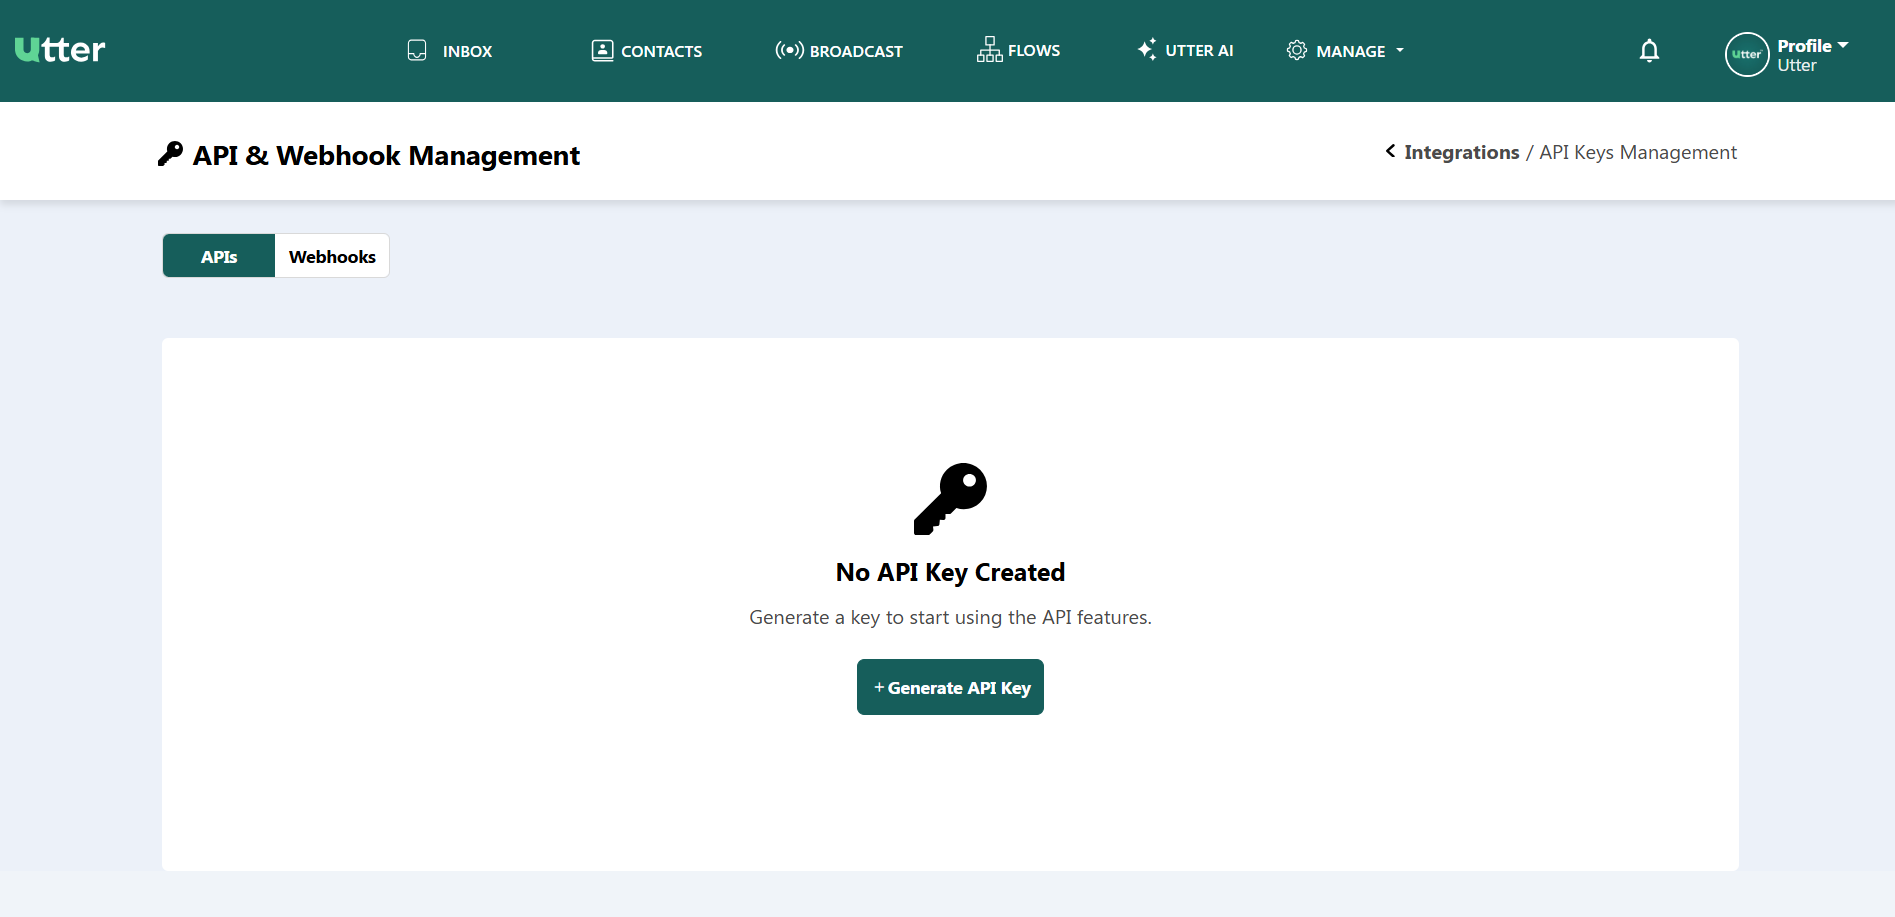
If you have not created an API key yet, click + Generate API Key.
API keys allow you to securely connect your external systems with Utter and access supported API features.
Step 3 — Generate an API Key
After clicking + Generate API Key, the Generate API Key window appears.
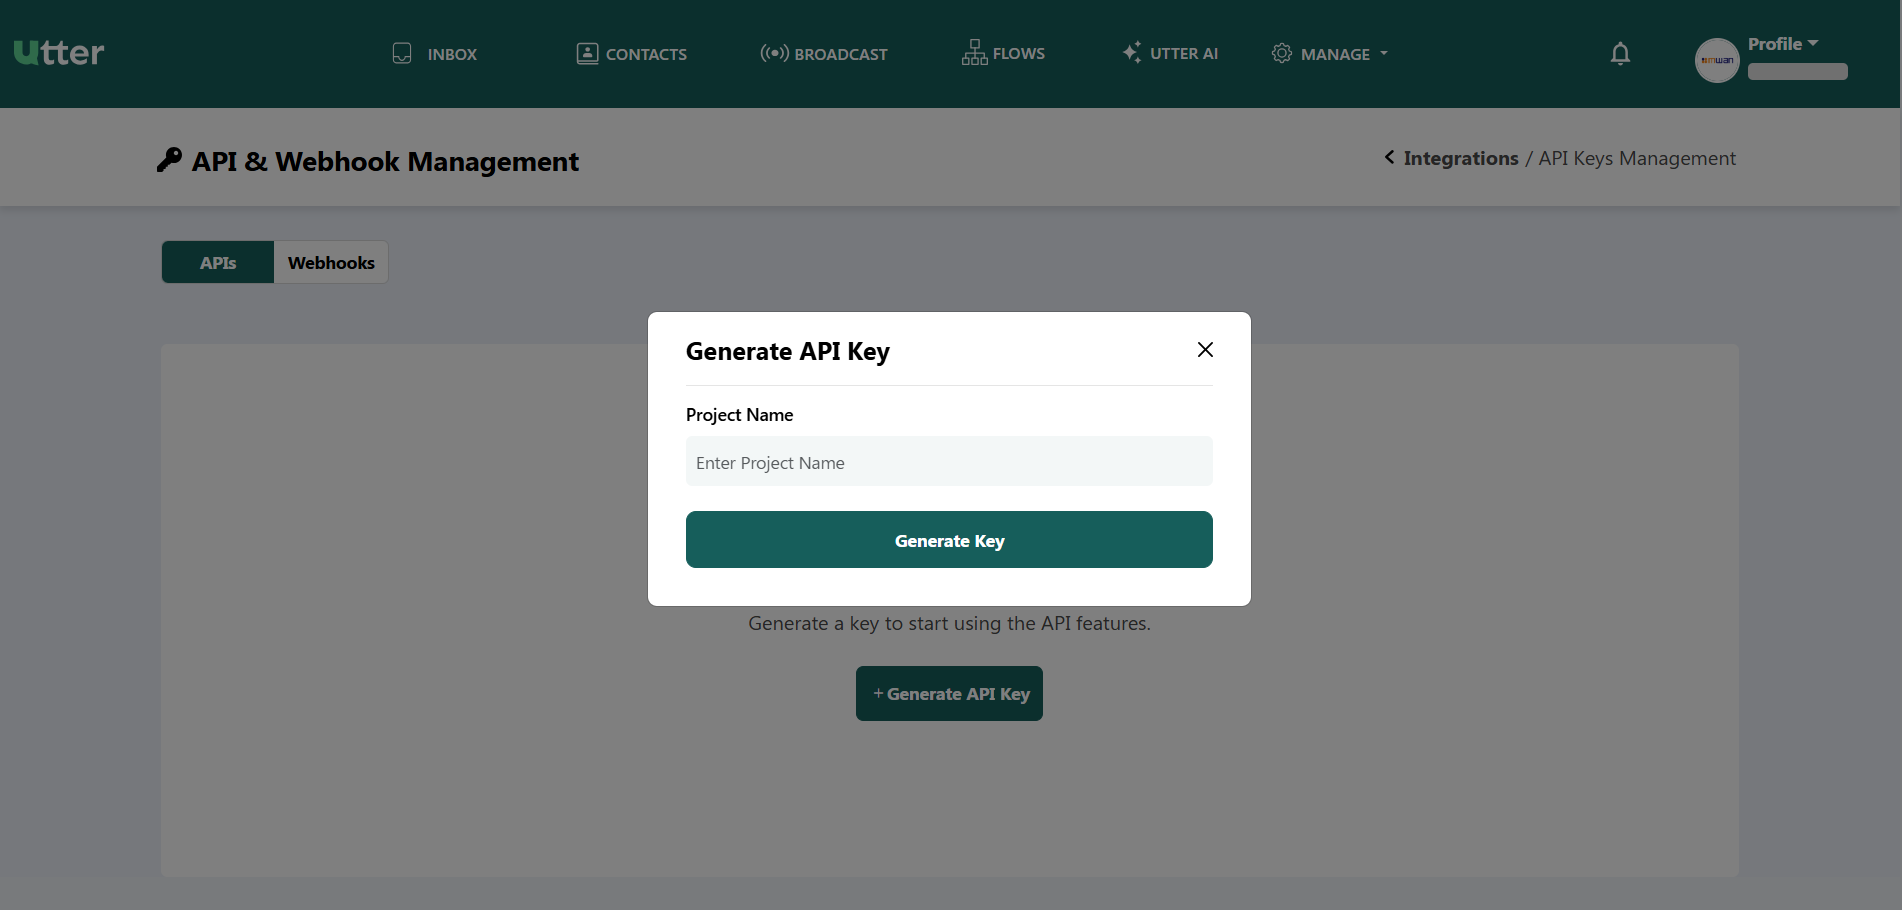
In the Project Name field, enter a name for your API key.
For example:
Utter Key
Then click Generate Key.
Utter generates the API key and displays it in a confirmation window.
Step 4 — Save the API Key
After the API key is generated, it is displayed only once.
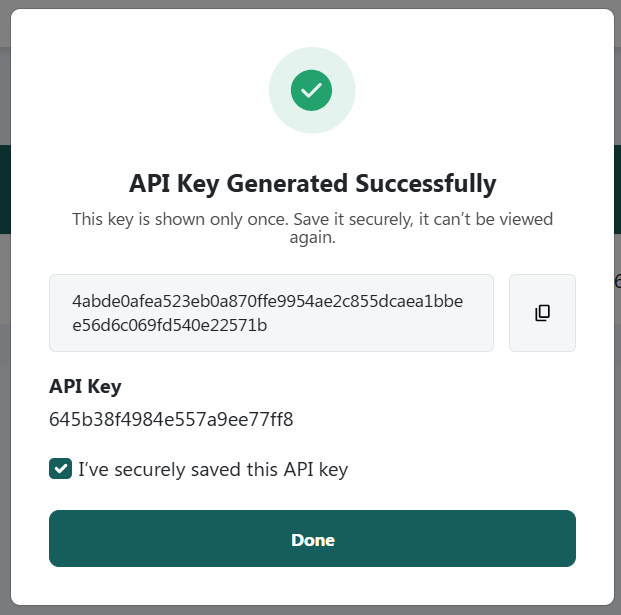
Follow these steps:
- Copy the API key.
- Save it securely.
- Select I've securely saved this API key.
- Click Done.
The API key cannot be viewed again after you close the confirmation window. Make sure you save the key before clicking Done.
Step 5 — View API Keys
After generating the API key, it appears in the APIs list.
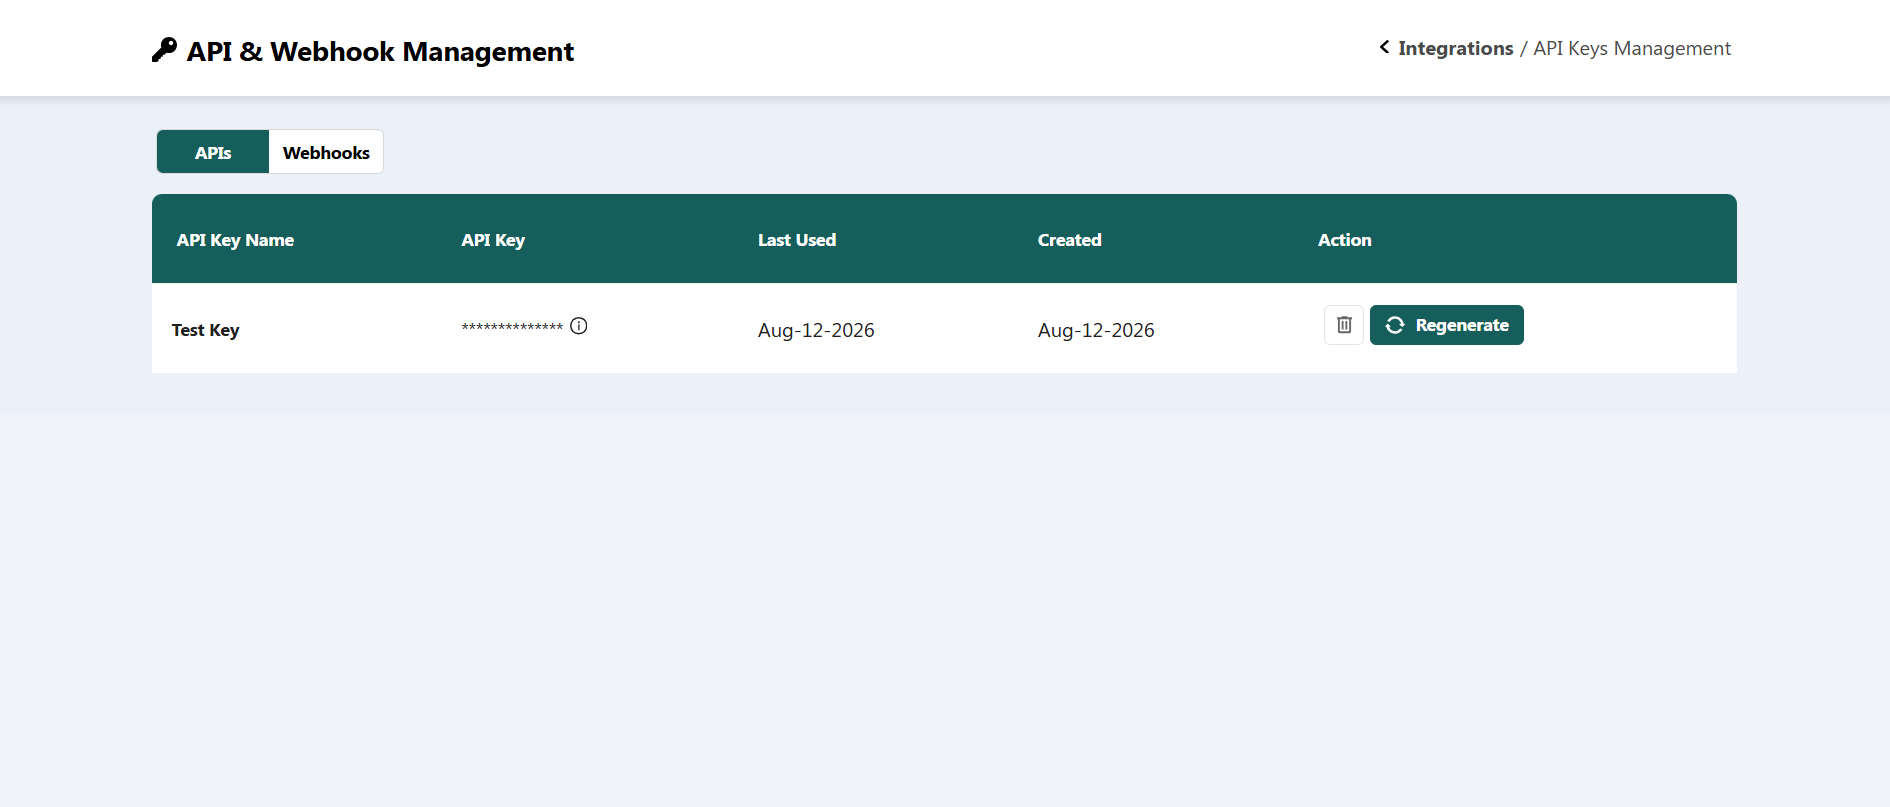
The API list displays:
| Column | Description |
|---|---|
| API Key Name | The name given when the API key was created. |
| API Key | The generated key is hidden for security. |
| Last Used | Shows when the API key was last used. |
| Created | Shows when the API key was created. |
| Action | Provides the option to regenerate the API key. |
Step 6 — Regenerate an API Key
If you need to replace an existing API key, click Regenerate in the Action column.
A new API key will be generated.
Save the newly generated API key securely. It will be shown only once.
Step 7 — Configure Webhooks
Webhooks allow your external system to receive notifications directly from Utter.
To manage webhooks:
- Open API & Webhook Management.
- Select the Webhooks tab.
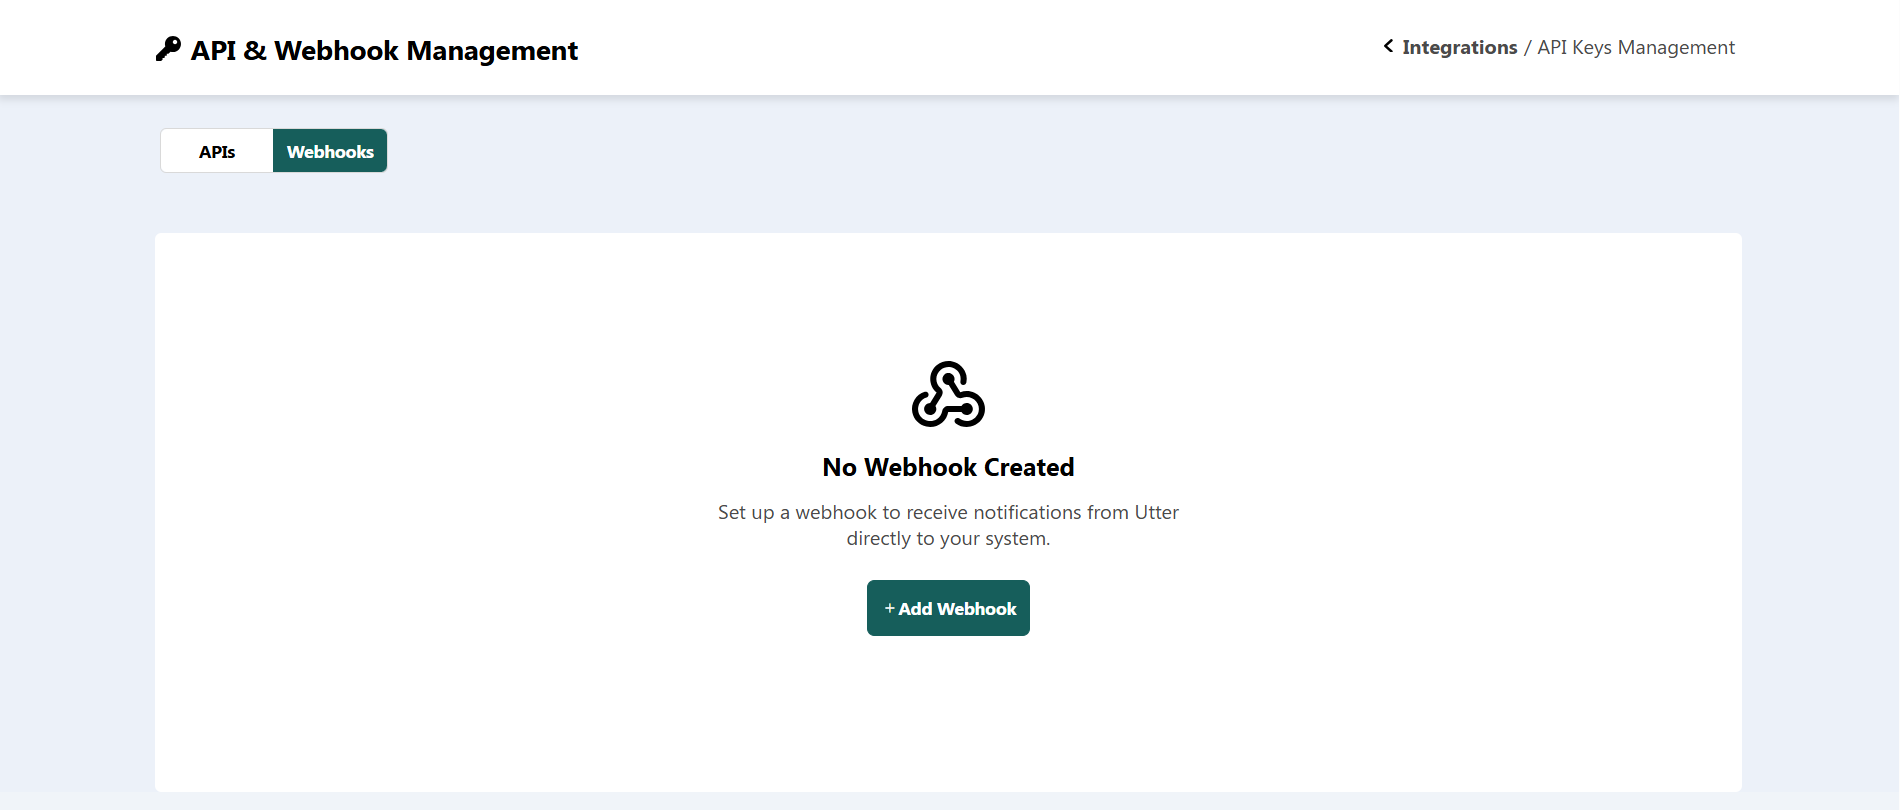
If no webhook has been configured, the page displays No Webhook Created.
Click + Add Webhook to create a webhook and configure it to receive notifications from Utter.
Quick Reference
| Task | Where to go |
|---|---|
| Access integrations | Manage → Integration |
| Manage API keys | API & Webhook Management → APIs |
| Generate an API key | + Generate API Key |
| Replace an API key | Action → Regenerate |
| Manage webhooks | API & Webhook Management → Webhooks |
| Create a webhook | + Add Webhook |
Treat your API key as a secret. Save it securely when it is generated because Utter displays it only once.