Utter Automation Flows Guide
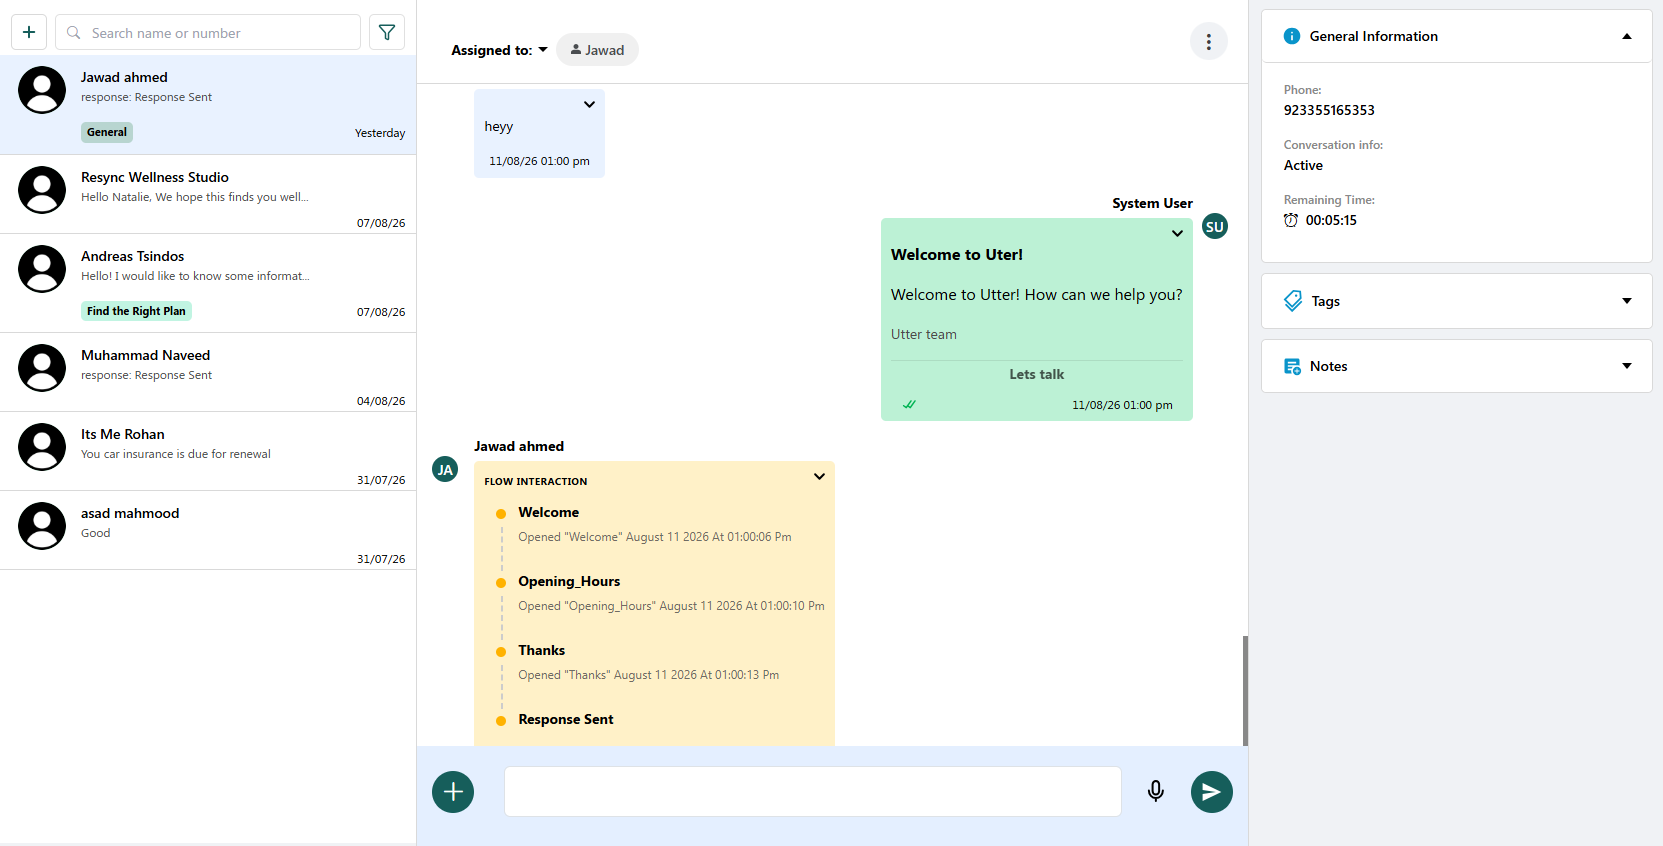
Flows let you automate initial chat interactions on Utter using keyword triggers. For example, if you assign the keyword "heyy" to a flow, the system automatically detects when a user sends that exact word and instantly sends the predefined flow into the chat thread — no manual effort needed from the agent.
Once triggered, the flow guides the user through a structured conversation using clickable buttons (such as "Welcome" or "Opening_Hours"), letting the user navigate and interact on their own.
There are two ways to build a flow: create one from scratch, or clone a pre-defined template. Both paths are covered below.
Creating a New Flow
Initiating the Flow
Click the "+ Create Flow" button in the top right of the Pre-define Flows or My Flows section. An "Add New Flow" popup appears, letting you build a completely custom automation from scratch.
Configuring Initial Details
The popup uses the same fields as the cloning process. Configure the following to initialize the flow:
- Flow Name: Enter a unique name for the new flow.
- Flow Category: Select a relevant category from the dropdown menu (e.g., lead generation, customer support).
- Keyword: Set the keyword(s) that will automatically trigger the flow when sent in a chat by any user.
- Message Title: Enter the main heading or subject for the flow's initial message.
- Message Body: Type the text that will be sent to the user when the flow is triggered (e.g., "Hey! Welcome to ABC Insurance...").
- Button Text: Enter the label for the quick reply button attached to the initial message (e.g., "Proceed").
Once the details are finalized, click "Create" to generate the new flow, or click "Cancel" to exit without creating one.
Accessing and Editing the New Flow
Once created, a flow is saved as a blank canvas.
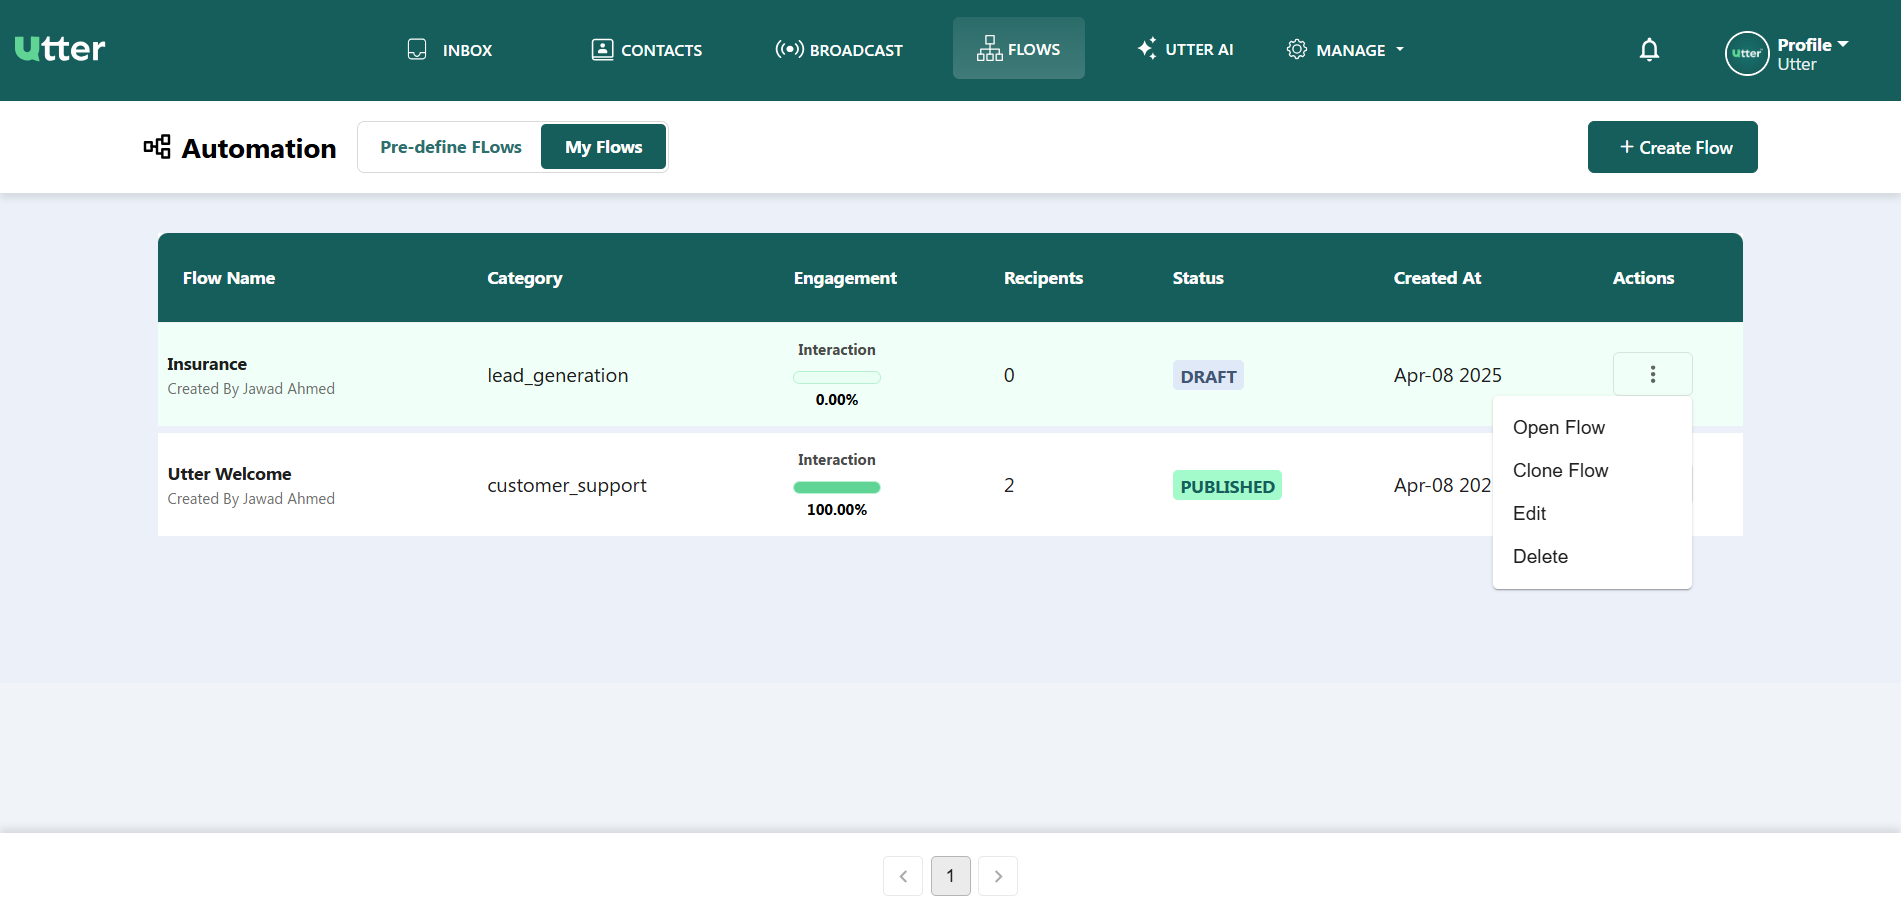
- Navigate to the "My Flows" tab under the Automation section to see a table listing all flows you have created.
- The table displays key metrics for each flow: Flow Name, Category, Engagement, Recipients, Status (shown as "DRAFT" for a newly created flow), Created At date, and an Actions menu.
- Click "Open Flow" from the Actions menu to open the full Flow Builder interface.
The Flow Builder Interface
Within the Flow Builder, you have complete control to design the new flow from the ground up:
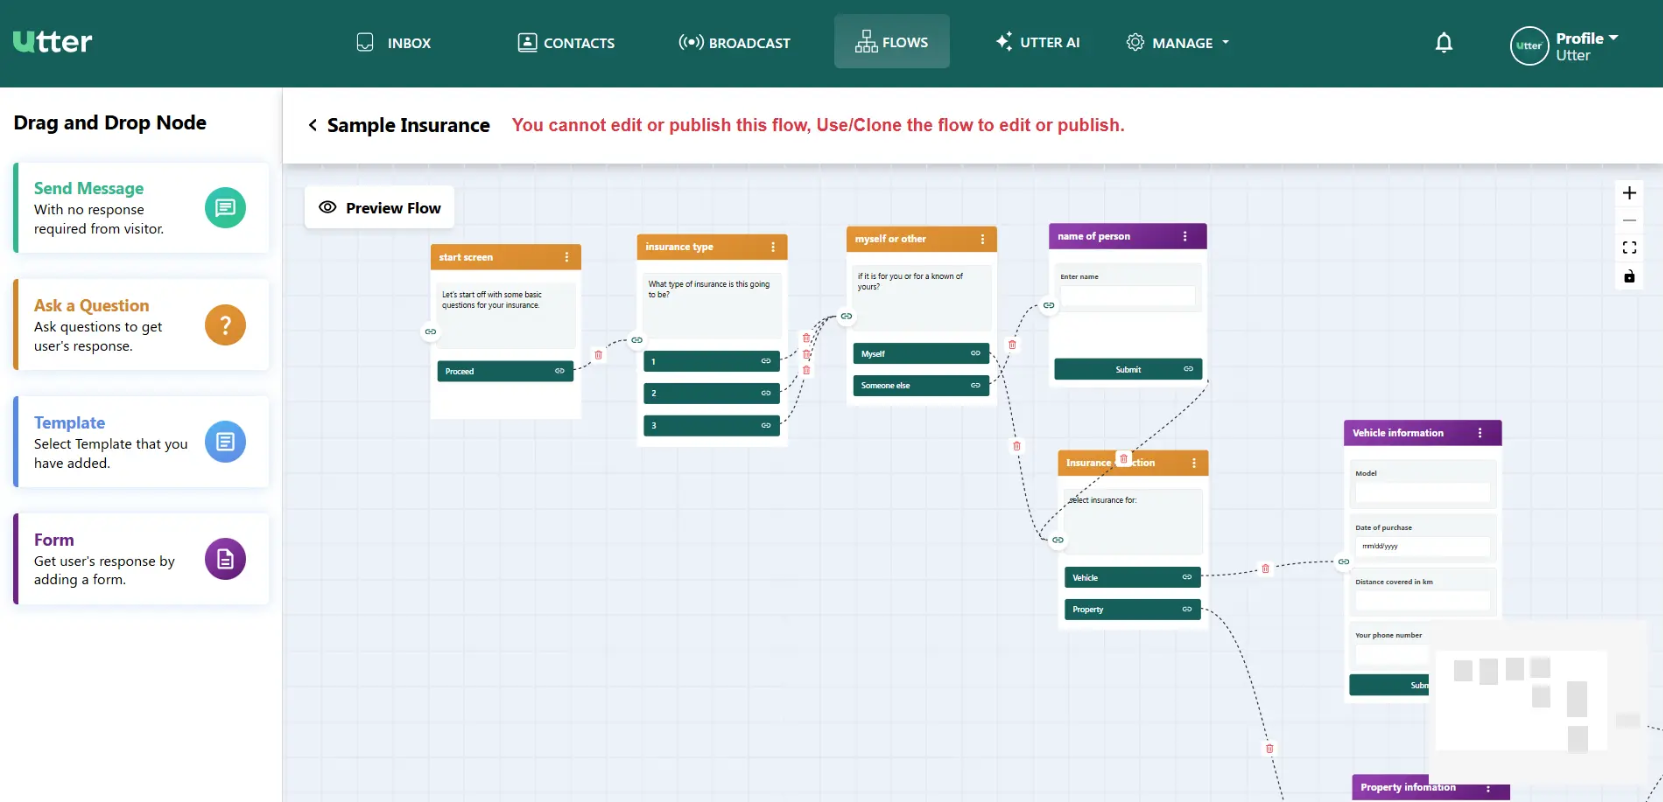
- Drag & Drop Nodes: From the left sidebar, drag node types such as "Send Message," "Ask a Question," "Template," or "Form" into the central canvas to build the conversation path.
- Connecting and Editing Nodes: Click on individual nodes to configure the specific questions, form fields (e.g., Model, Date of purchase), and response logic. Connect nodes to map out the exact user journey.
- Saving and Publishing: Click "Save Changes" to keep the flow in draft mode, or click "Publish Flow" in the top right corner to make it live and active.
Pre-defined Flows
Overview
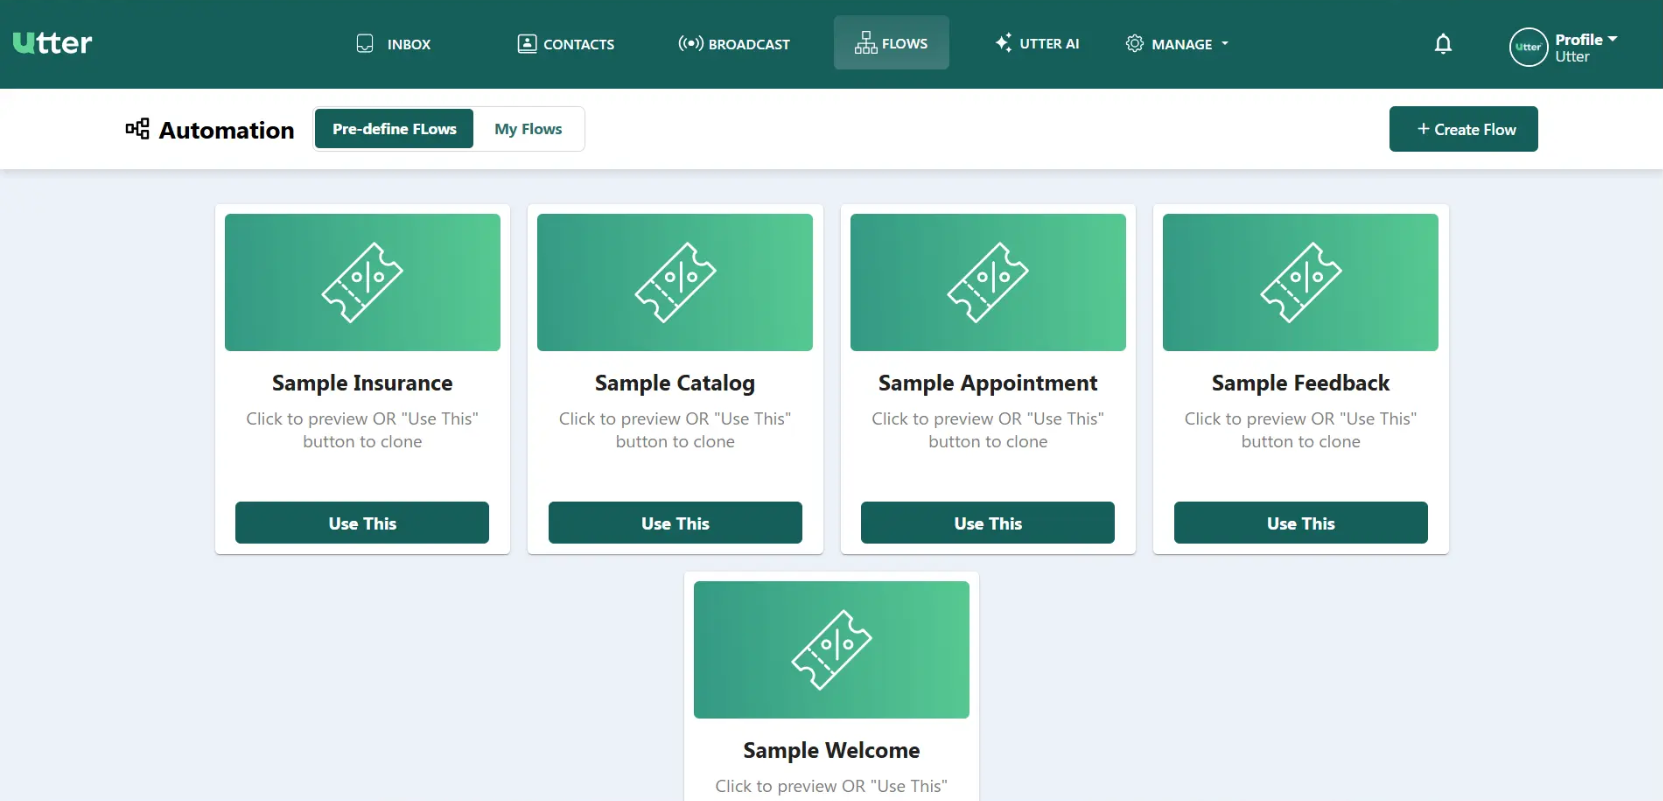
Navigate to the Flows module and select Pre-define Flows to access a library of ready-to-use flow templates (e.g., Sample Insurance, Sample Catalog, Sample Appointment, Sample Feedback, Sample Welcome). These templates provide a foundational structure that can be easily customized to fit your business needs.
Previewing a Pre-defined Flow
Clicking on a flow card opens a visual diagram of the flow, letting you review the pre-built logic and node connections.
A red notification banner at the top of the preview reads: "You cannot edit or publish this flow, Use/Clone the flow to edit or publish." This view is strictly for reviewing — to make changes, you must clone the flow first.
Cloning a Pre-defined Flow
To actually use and modify a flow, you must clone it.
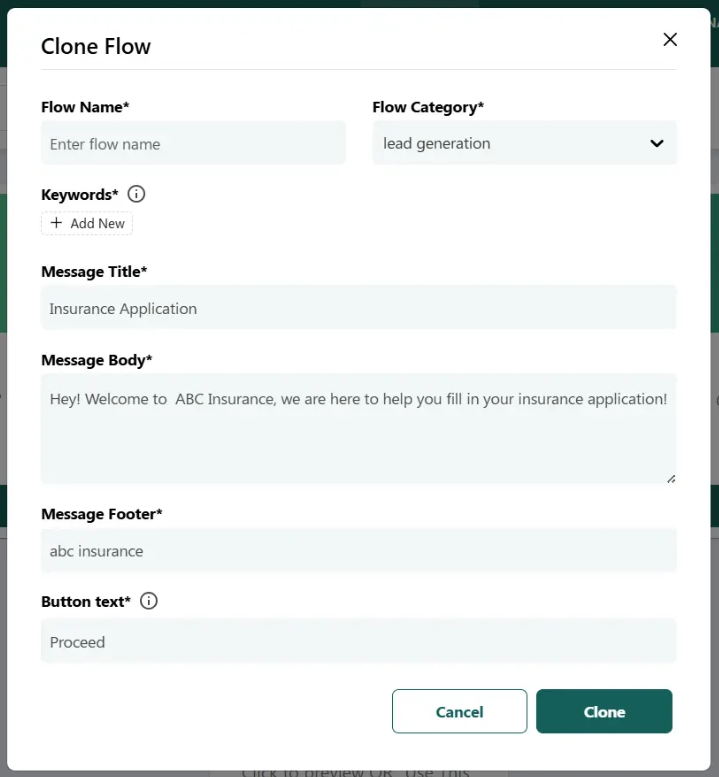
- Click the "Use This" button at the bottom of the desired flow card to open a "Clone Flow" popup.
- In this popup, configure the following details:
- Flow Name: Enter a custom name for the new flow.
- Flow Category: Select a category from the dropdown menu (e.g., lead generation).
- Keyword: Set the keyword(s) that will automatically trigger the flow.
- Message Title / Message Body / Button Text: Edit the default pre-filled text to match your specific campaign.
- Click "Clone" to save the flow, or "Cancel" to exit without creating a copy.
Accessing and Editing the Cloned Flow
Once cloned, a flow is no longer a restricted template.
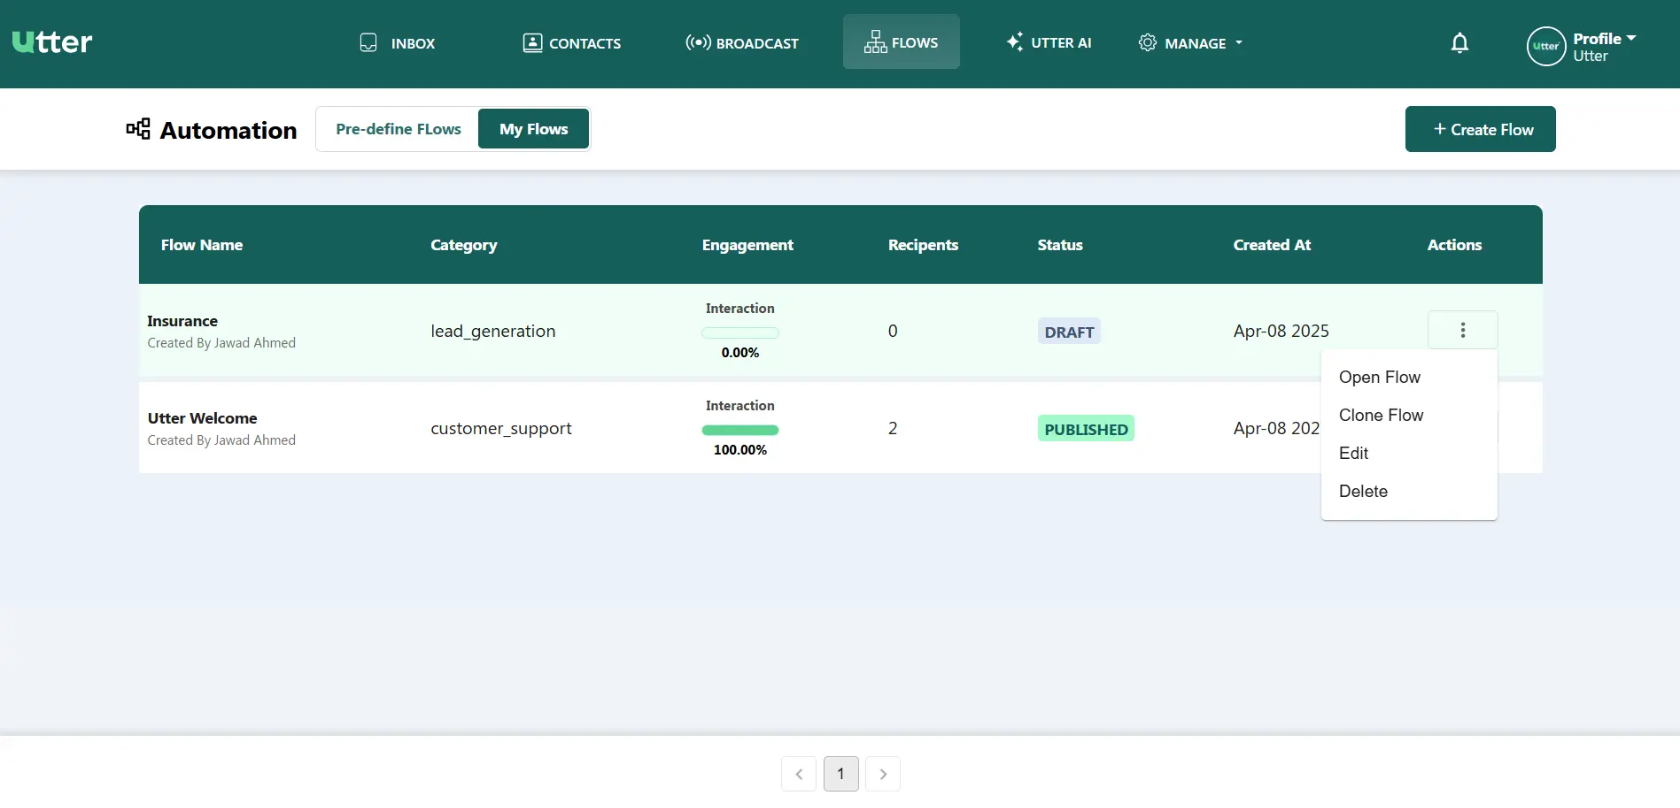
- Navigate to the "My Flows" tab under the Automation section to see a table listing all flows you have created or cloned.
- The table displays key metrics for each flow: Flow Name, Category, Engagement, Recipients, Status (e.g., DRAFT or PUBLISHED), Created At date, and an Actions menu.
- The newly cloned flow appears here with a "DRAFT" status. Click "Open Flow" from the Actions menu to open the full Flow Builder interface.
The Flow Builder Interface
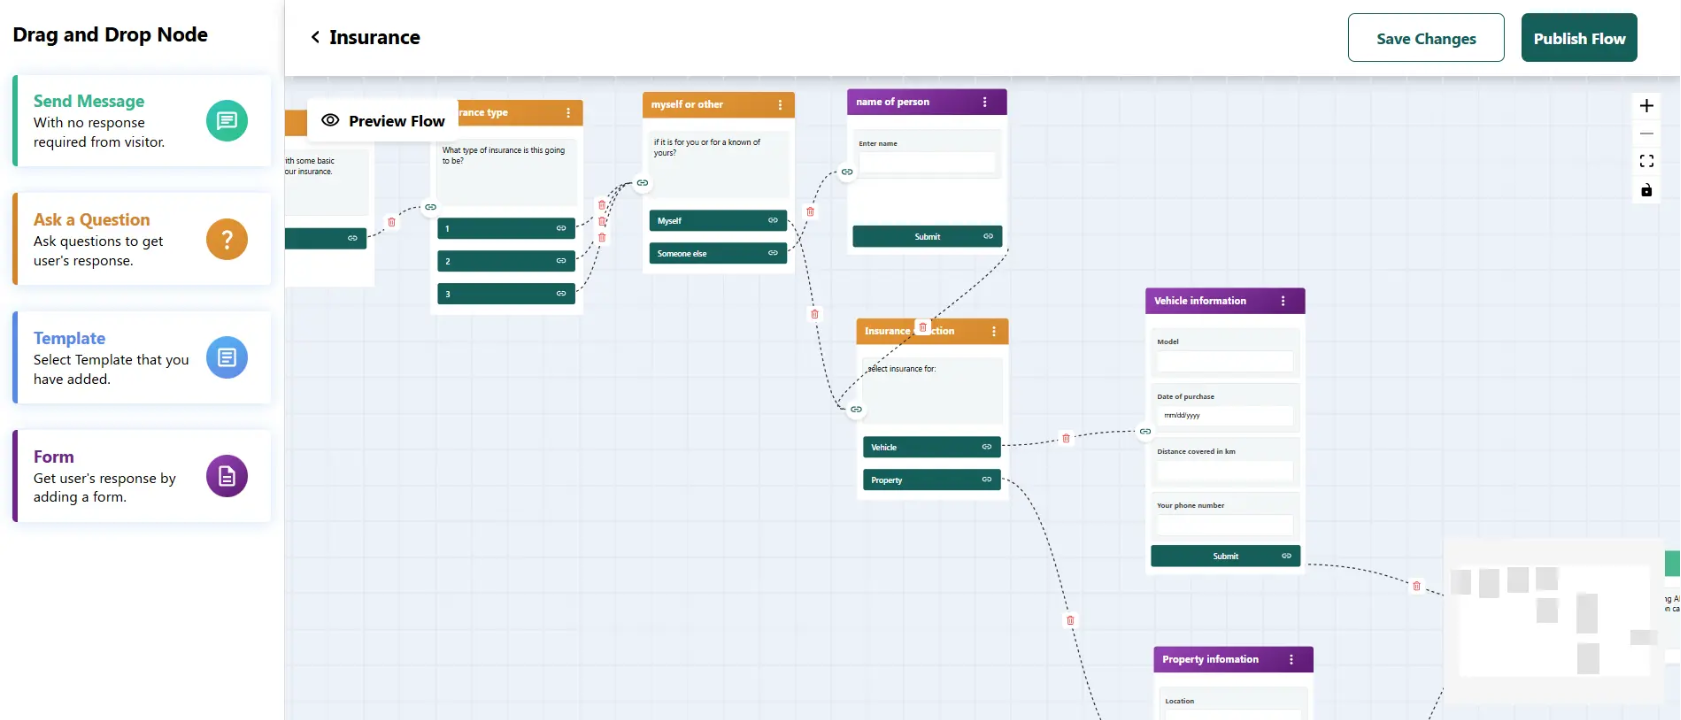
Within the Flow Builder, you have complete control to customize the cloned flow:
- Drag & Drop Nodes: From the left sidebar, drag node types — such as "Send Message," "Ask a Question," "Template," or "Form" — into the central canvas to build or modify the conversation path.
- Editing Nodes: Click on individual nodes (e.g., "insurance type," "Vehicle information") to configure the specific questions, forms, and response logic within them.
- Saving and Publishing: Once modifications are complete, click "Save Changes" to keep the flow in draft mode, or click "Publish Flow" in the top right corner to make it live and active.
Managing Flows via the Actions Menu
Click the Actions menu (three dots) on the right side of any flow in the "My Flows" table to manage its lifecycle. The available actions depend on the flow's current status.
For Draft Flows:
- Open Flow: Takes you directly into the visual Flow Builder to view, design, and connect nodes.
- Clone Flow: Creates an exact duplicate of the selected flow. You'll be prompted to enter a new name for the cloned version, leaving the original flow untouched.
- Edit: Lets you quickly modify the basic details of the flow — such as the Flow Name or Category — without opening the full builder interface.
- Delete: Permanently removes the draft flow and its configuration from the system.
For Published Flows:
- Deprecate: Once a flow is "PUBLISHED" and actively running, destructive actions like Delete are replaced by Deprecate. This takes the flow offline and disables it, ensuring it no longer triggers for end-users, while safely keeping the flow data intact for historical records.