Broadcast
The Broadcast feature in Utter allows an admin or agent to send a message to multiple recipients at once. Broadcast messaging is useful for announcements, promotions, or important updates while delivering the message to recipients as individual conversations.
Broadcast overview
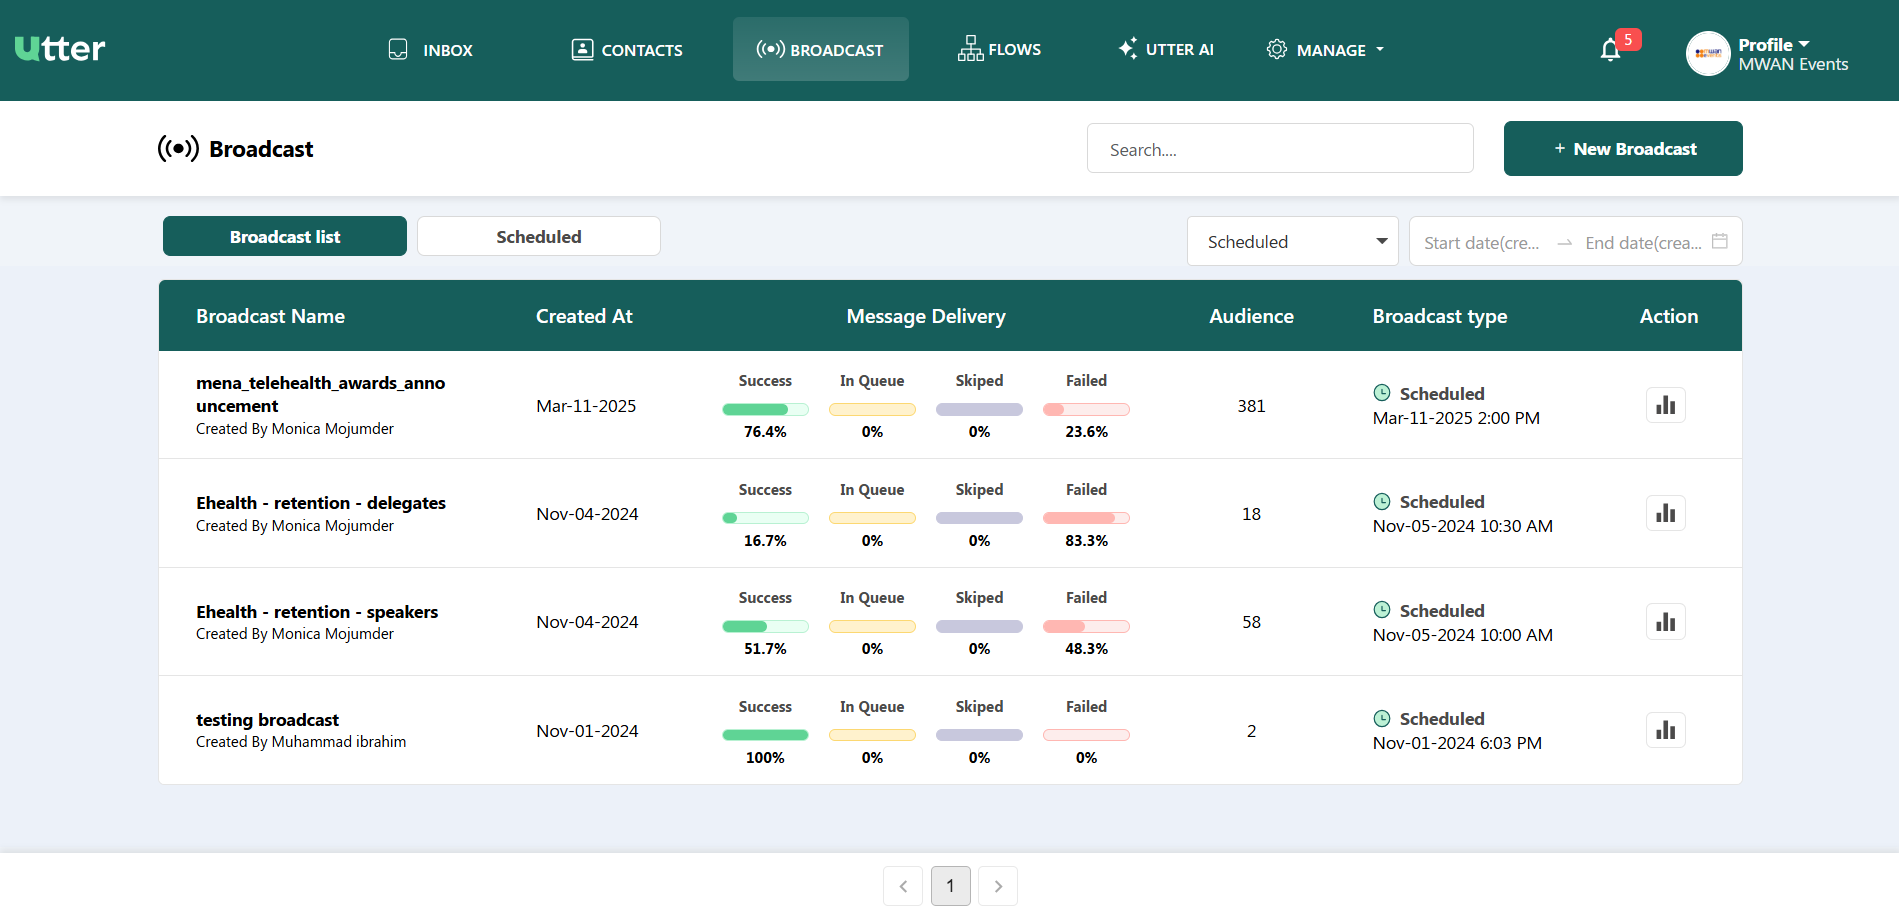
Open the Broadcast section to view existing broadcasts.
The broadcast list provides an overview of previously created broadcasts, including information about message delivery and the broadcast audience.
Step 1 — Create a new broadcast
Click New Broadcast to start creating a broadcast.
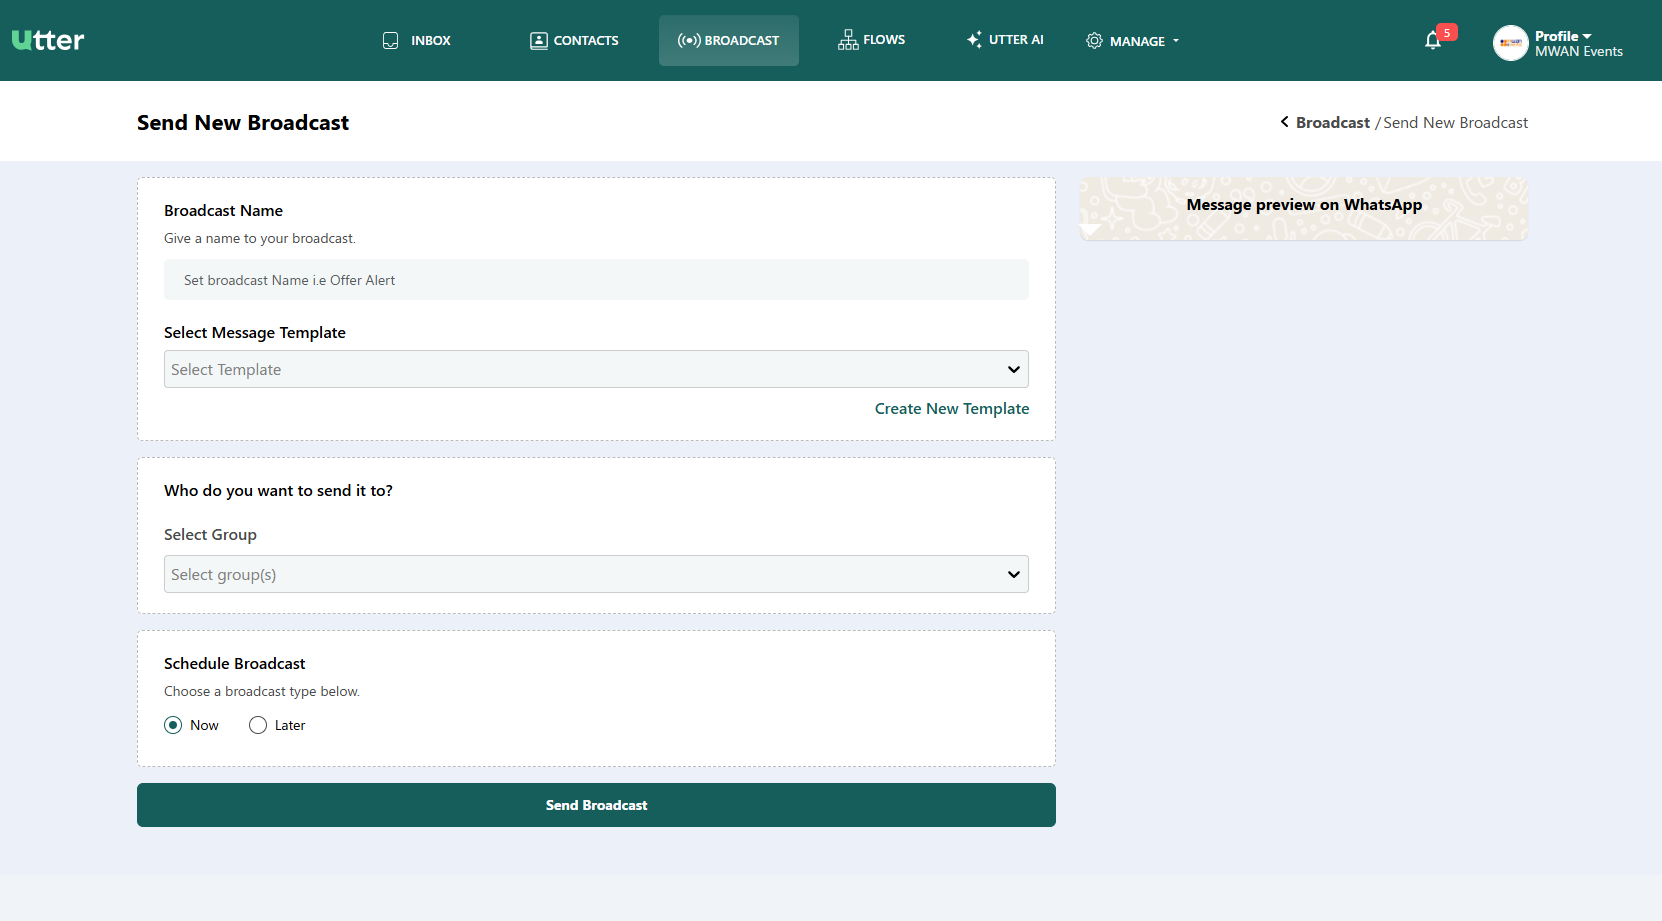
Enter a broadcast name
Enter a descriptive name in the Broadcast Name field.
Use a name that makes the broadcast easy to identify later.
Select a message template
Choose a template from the list of previously created templates.
Selecting an existing template helps keep your broadcast messaging consistent.
If needed, you can use Create New Template from the broadcast screen to create a template.
Select the audience
Under Who do you want to send it to?, select the target audience.
You can either:
- Select a specific group from your broadcast groups.
- Select all contacts from your contact list.
Step 2 — Choose when to send the broadcast
Under Schedule Broadcast, choose whether to send the broadcast immediately or schedule it for later.
Send now
Select Now when you want to send the broadcast immediately.
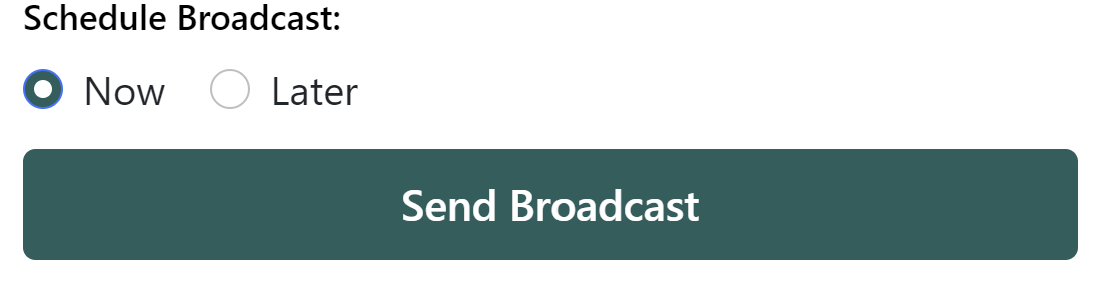
After selecting Now, click Send Broadcast Message.
Schedule for later
Select Later when you want the broadcast to be sent at a specific date and time.
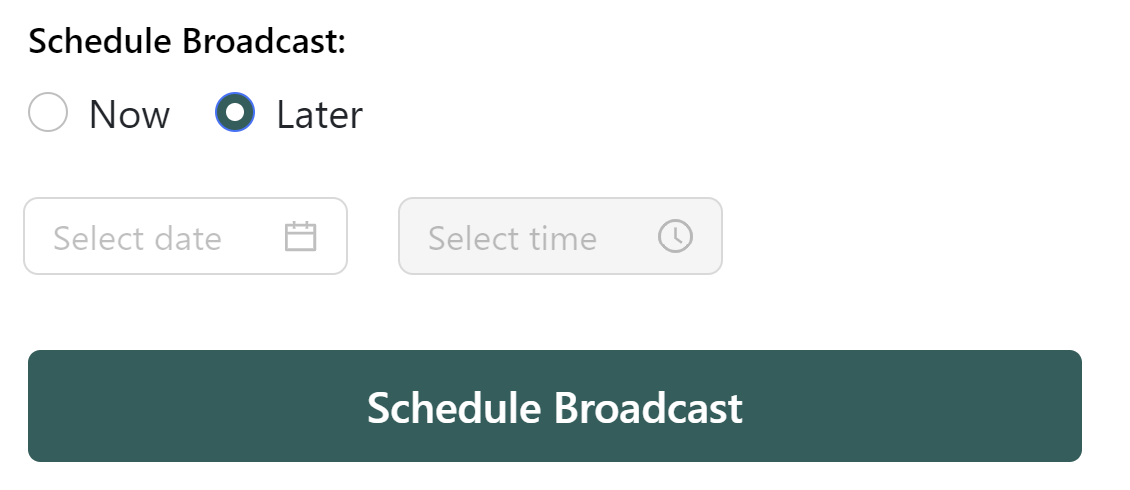
- Select Later.
- Select the required date.
- Select the required time.
- Click Schedule Broadcast.
The source documentation specifies that selecting Later requires a date and time before scheduling the broadcast.
Before sending or scheduling, make sure the broadcast name, template, and target audience are correct.
Step 3 — Send or schedule the broadcast
After completing the broadcast details:
- Click Send Broadcast Message when Now is selected.
- Click Schedule Broadcast when Later is selected.
The selected action will either send the broadcast or schedule it for the specified date and time.
Step 4 — View broadcast status
Click a broadcast from the broadcast list to view its delivery status.
The overview provides a status breakdown for the selected broadcast.
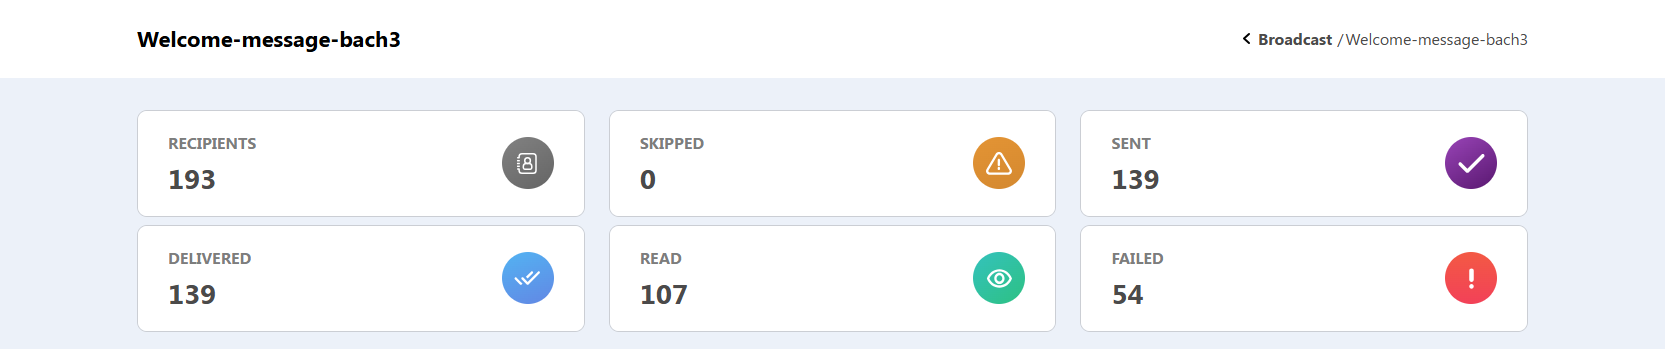
The broadcast status includes:
| Status | Description |
|---|---|
| Recipients | Total number of targeted recipients |
| Skipped | Recipients that were skipped |
| Sent | Messages that were sent |
| Delivered | Messages that were delivered |
| Read | Messages that were read |
| Failed | Messages that failed to send or deliver |
These status categories are provided in the Broadcast overview.
Step 5 — View broadcast details
Click a specific broadcast to open its Broadcast Detail page.
The detail page displays a table containing the contacts targeted by the broadcast.
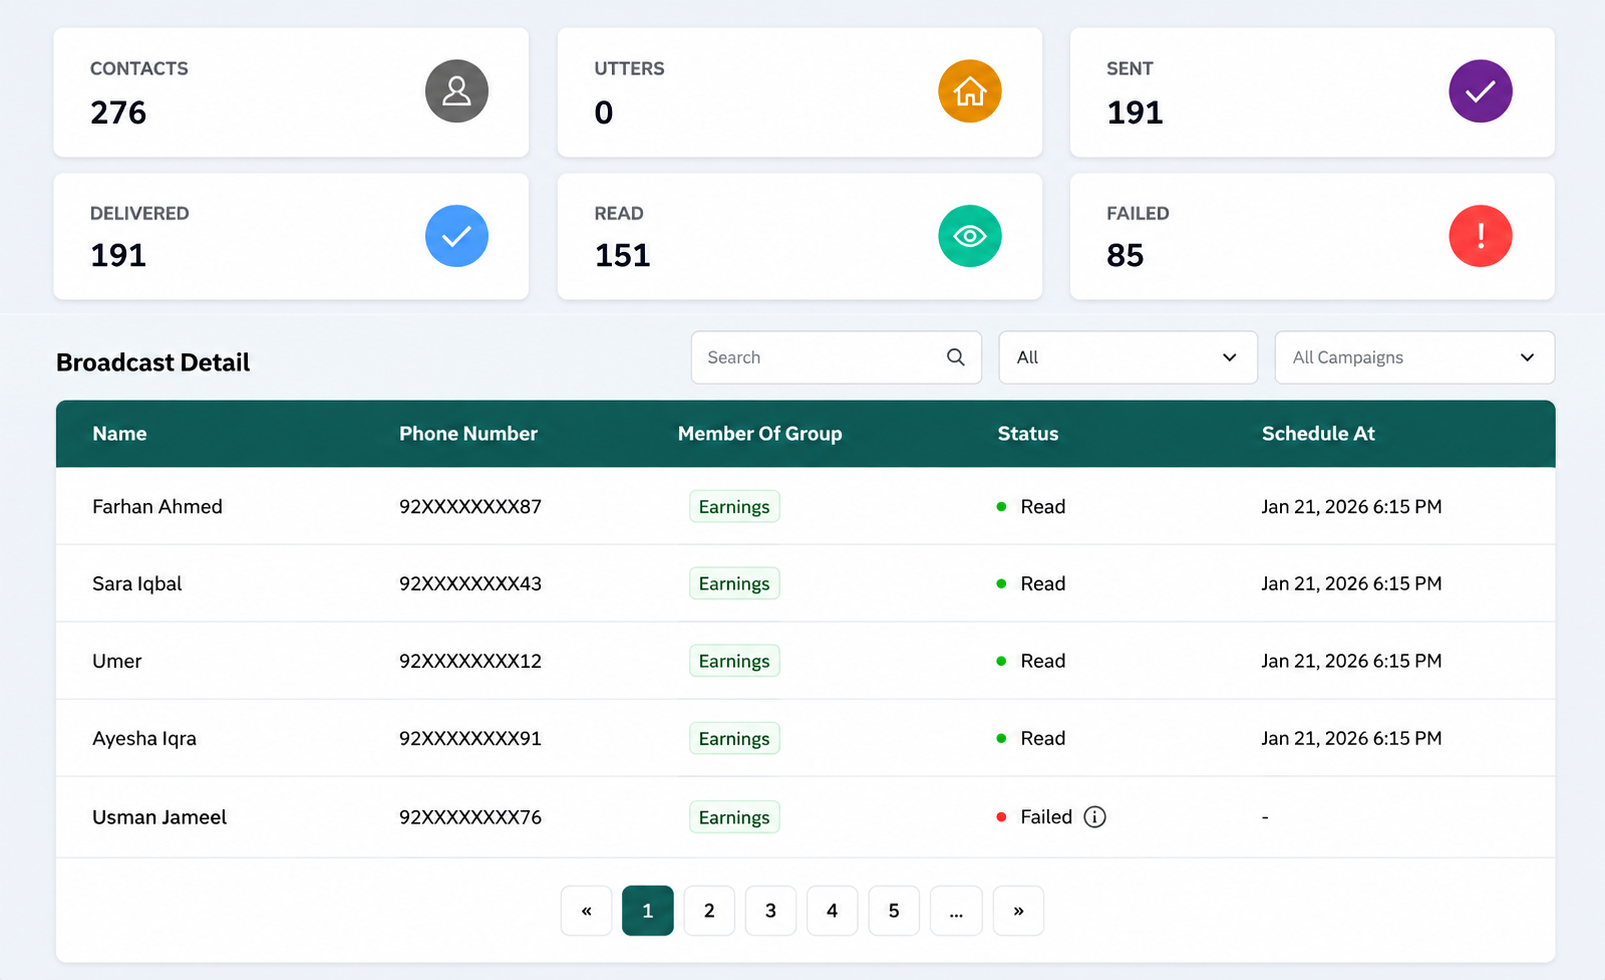
For each recipient, the table displays:
- Name — The contact's name.
- Phone Number — The recipient's phone number.
- Group — The group the contact belongs to.
- Status — The current message status, such as Read or Failed.
- Delivery Time — The timestamp associated with the delivery status.
- Failure Reasons — When applicable, a popup tooltip explains why a message failed.
Example failure reason
When a message fails, the failure reason can be displayed in a tooltip, such as:
Message not delivered to maintain ecosystem engagement
This helps the admin understand why the message was not delivered.
Quick workflow
| Step | Action |
|---|---|
| 1 | Open Broadcast |
| 2 | Click New Broadcast |
| 3 | Enter a Broadcast Name |
| 4 | Select a Template |
| 5 | Select the target Group or contacts |
| 6 | Choose Now or Later |
| 7 | Send or schedule the broadcast |
| 8 | Open the broadcast to view its status |
| 9 | Open Broadcast Detail to view recipient-level information |
Need more detail?
For related functionality, see:
- Contacts — Manage contacts and groups used as broadcast audiences.
- Message Templates — Create and manage templates used when sending broadcasts.