Add a Payment Card to WhatsApp Business Account
To use WhatsApp Business Platform messaging, you need to add a valid credit or debit card to your Meta Business Manager account. This allows Meta to process applicable messaging charges and helps keep your WhatsApp Business messaging active without interruption.
1. Log in to Meta Business
- Go to business.facebook.com.
- Log in with the Facebook account that has admin rights to your Meta Business Account.
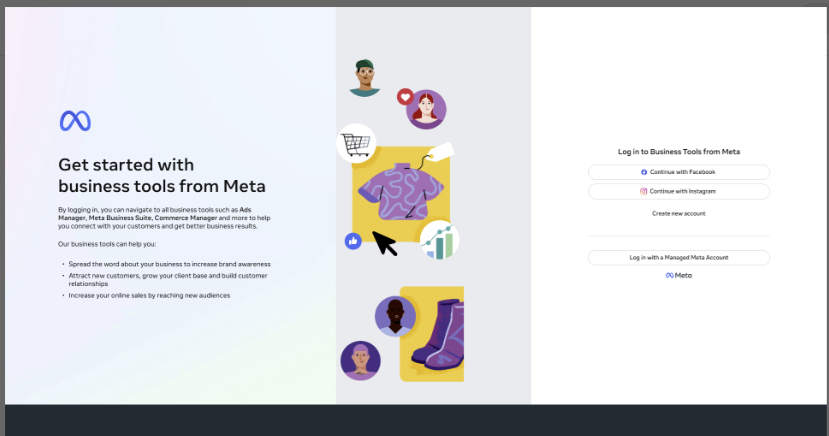
Ensure you are using an admin account to access Business Settings and Billing features.
2. Select the Business Portfolio
After opening the relevant Meta Business settings, you may be asked to select a Business Portfolio. A Business Portfolio is the workspace in Meta where your business assets are managed, including your WhatsApp Business Account, Facebook Pages, Instagram accounts, and advertising accounts.
Select the Business Portfolio that owns or manages the WhatsApp Business Account you want to configure.
If your Meta account has access to multiple Business Portfolios, carefully check the business name before making a selection. Choosing the wrong Business Portfolio may cause you to configure the payment settings for a different business or prevent you from finding the correct WhatsApp Business Account.
Once you have identified the correct portfolio, click on it to continue.
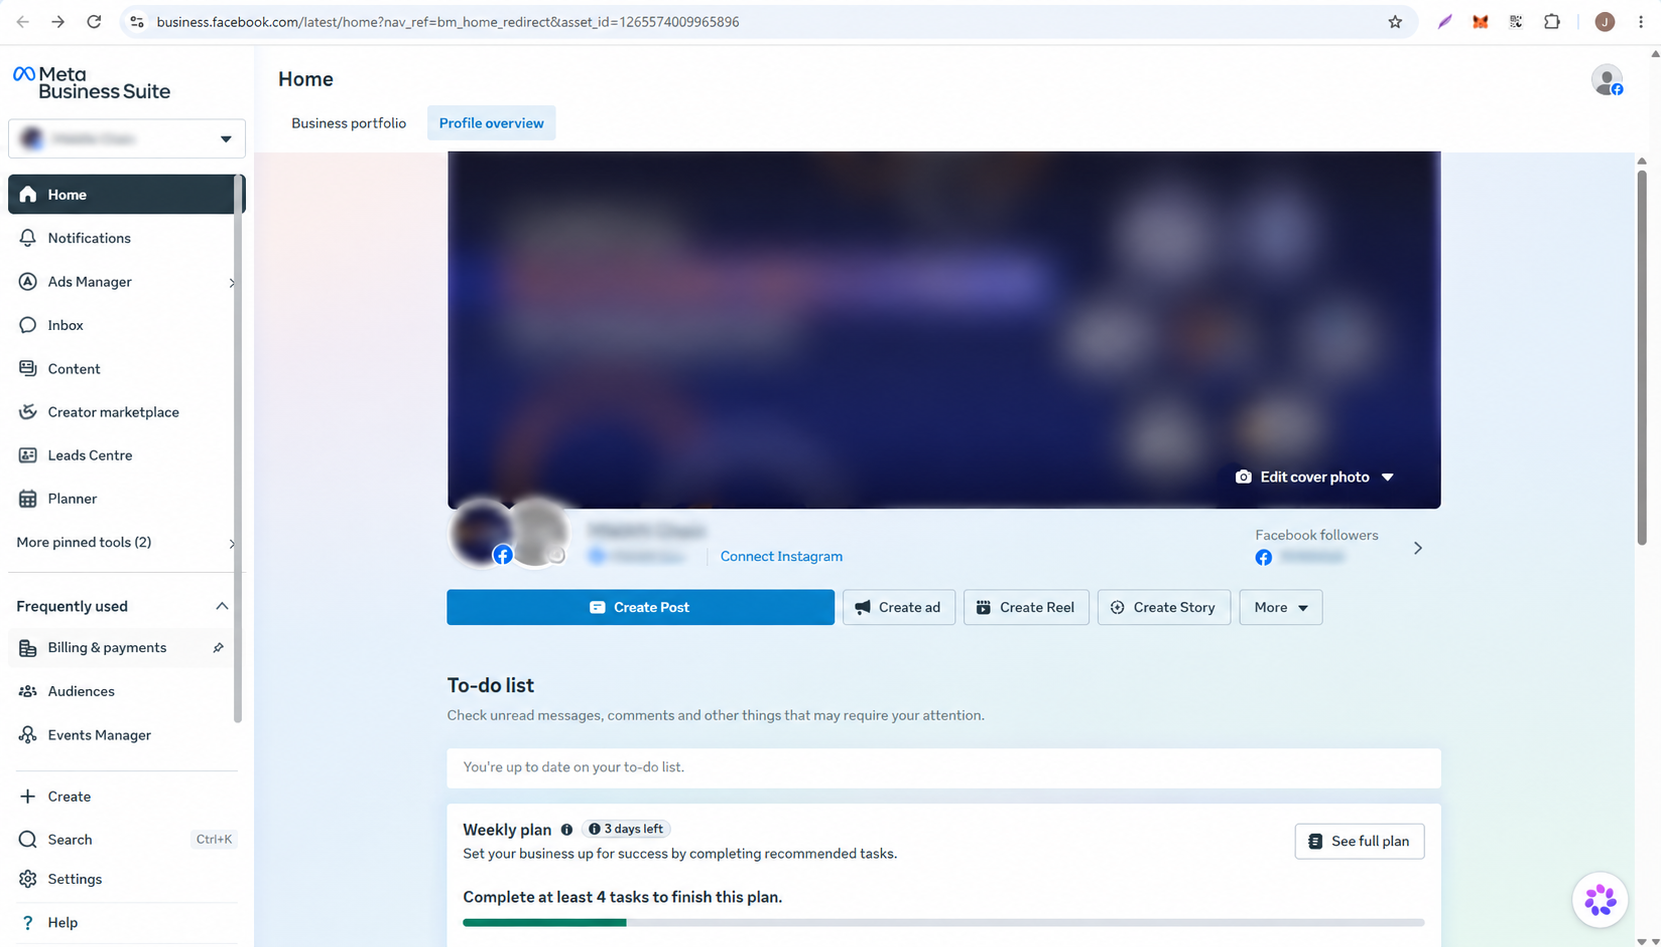
3. Open Billing & Payments
- Open the left menu and select All Tools.
- Click Billing & Payments or Payment Settings.
- Under Payment Account, verify that you have selected the correct Meta Business Account.
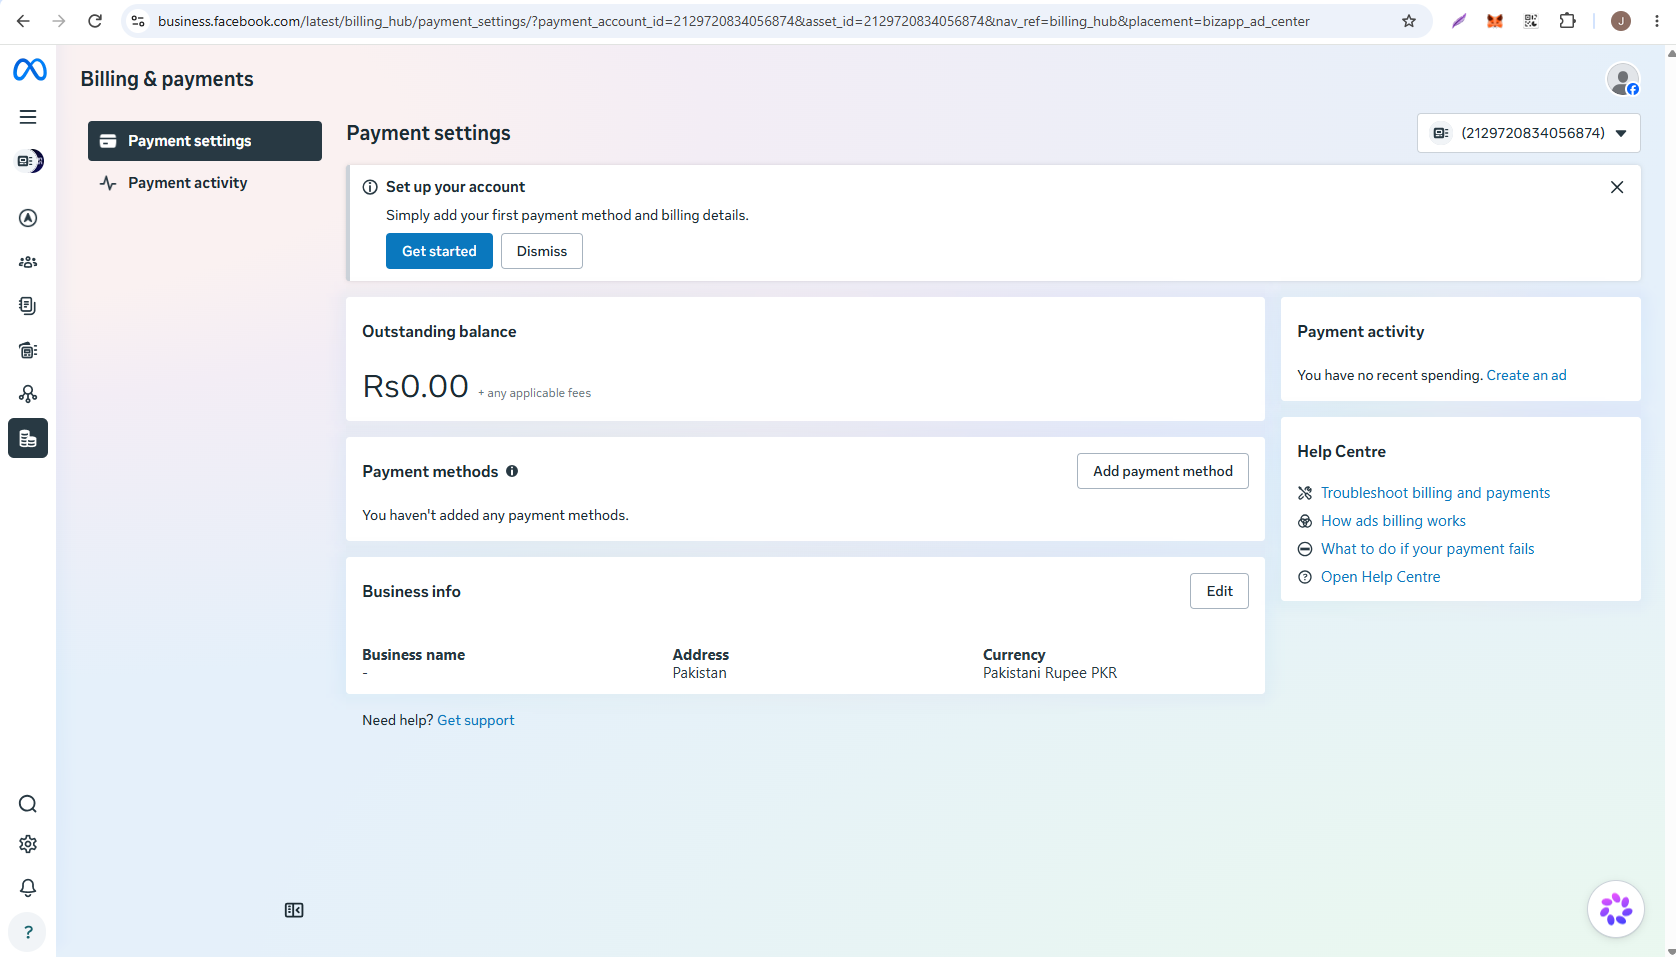
4. Click "Add Payment Method"
- Next to Payment Methods, click Add Payment Method.
- Choose Debit or Credit Card from the available options.
- Click Next.
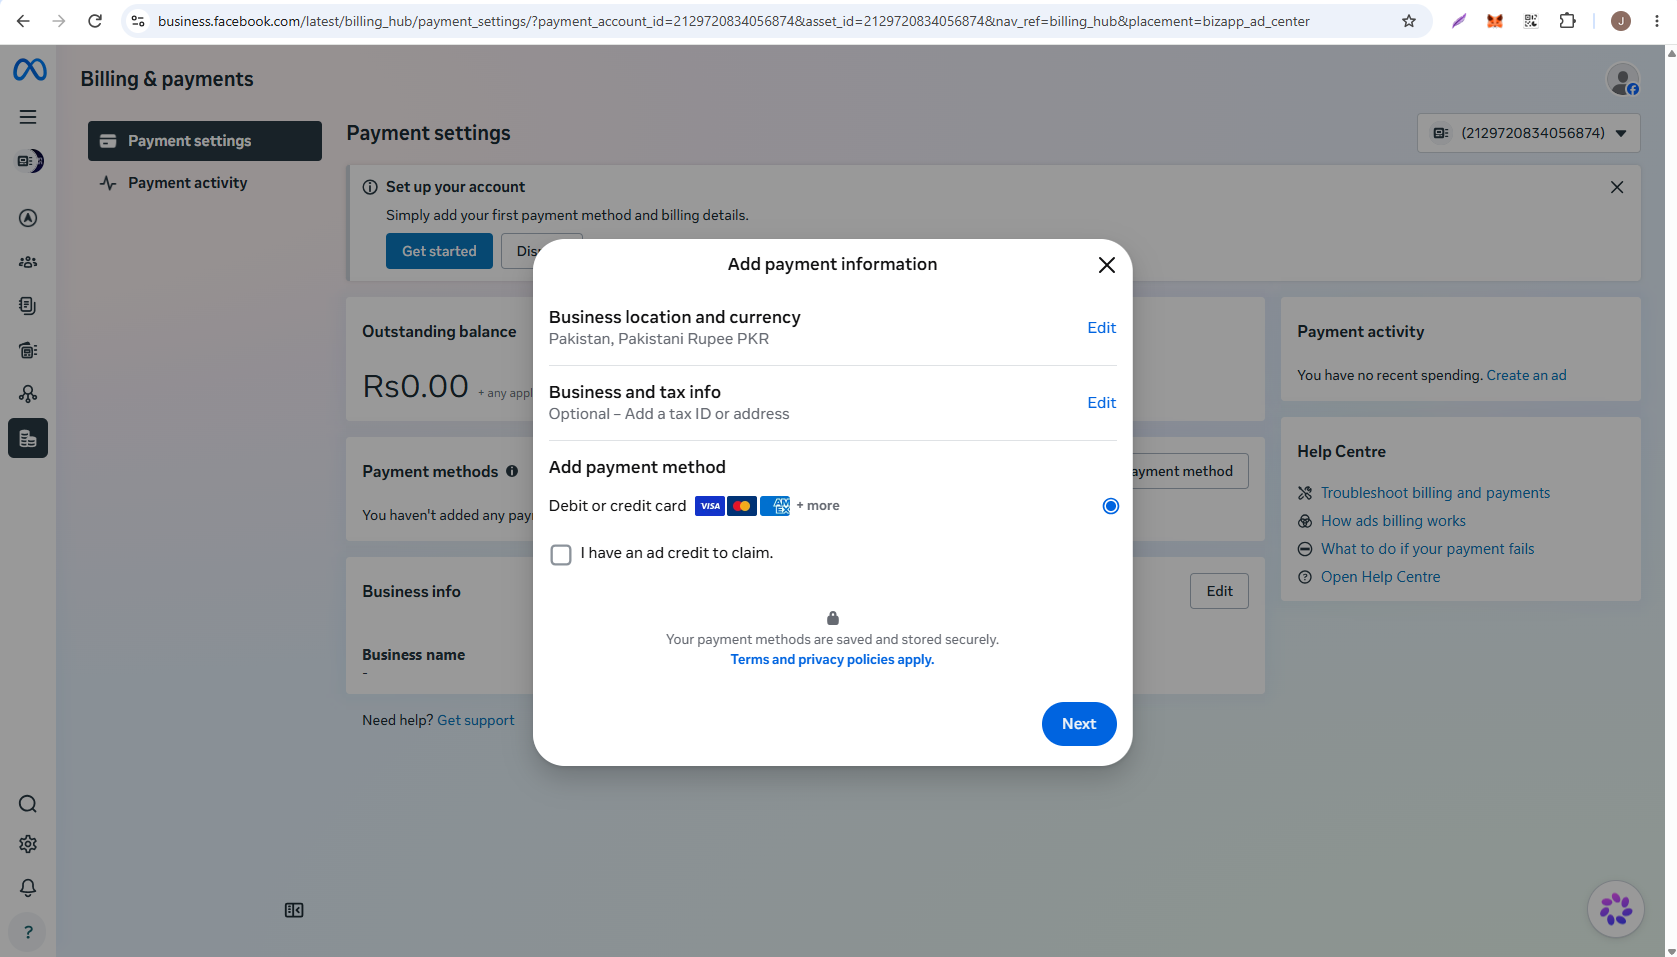
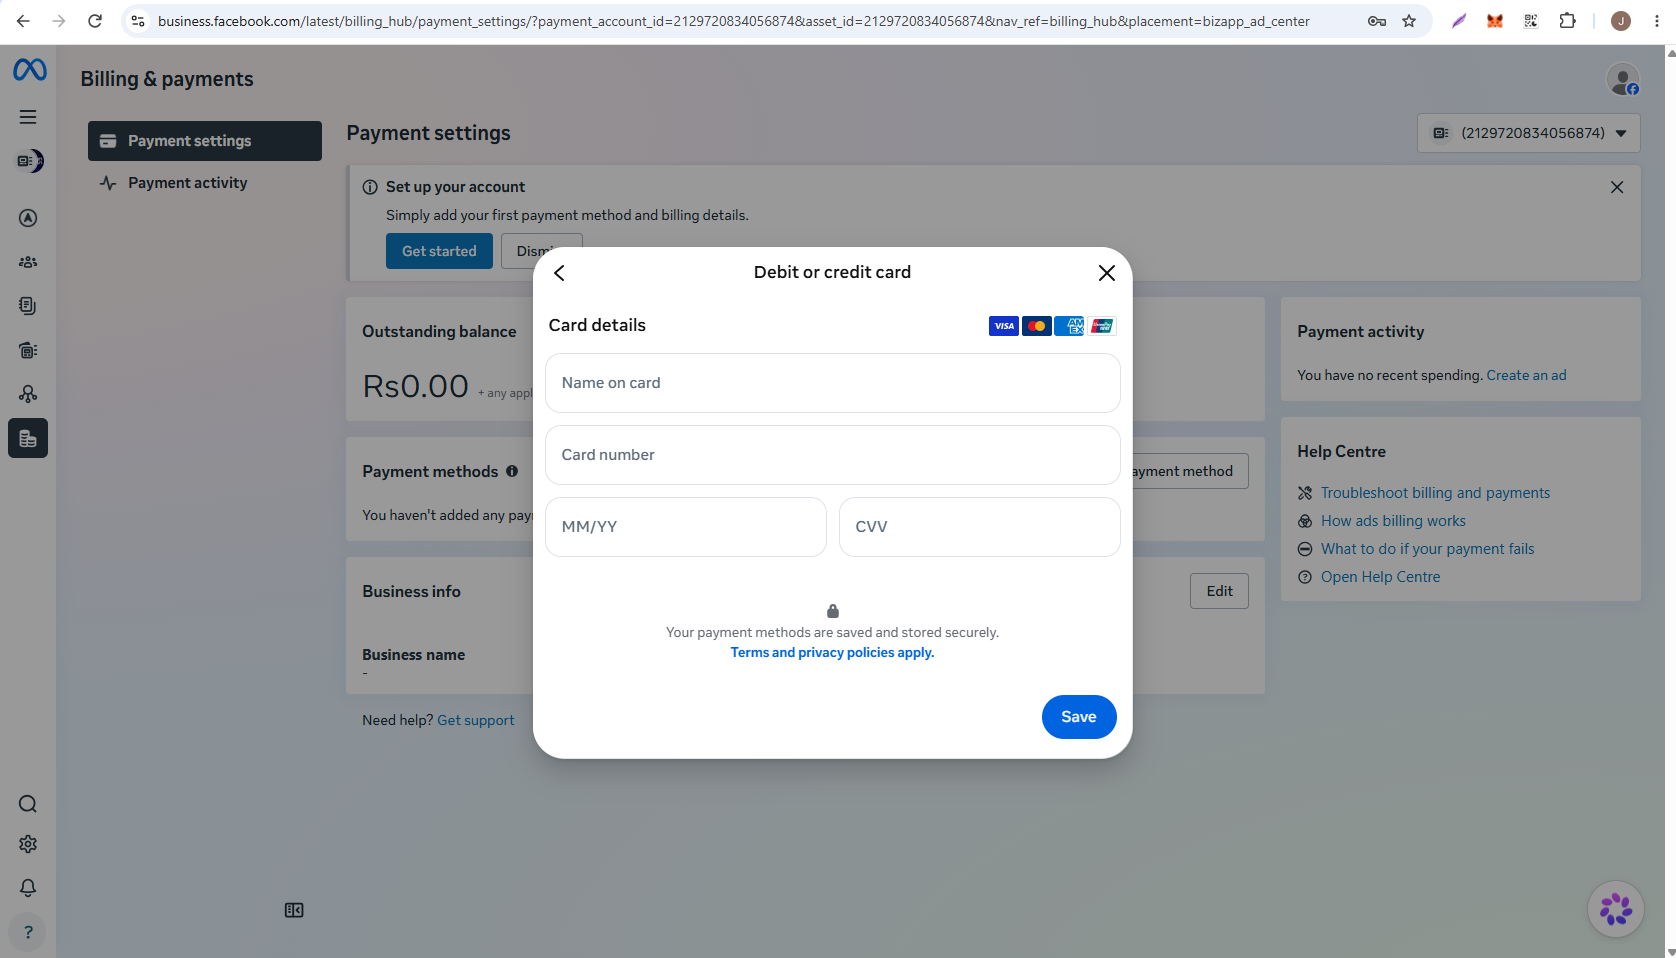
5. Enter Card Details
Fill in the required payment details:
- Cardholder Name
- Card Number
- Expiration Date
- CVV Code
- Billing Address (if requested)
Click Save.
:::warning Important Ensure your card is authorized for international transactions and online payments. Meta may place a small temporary holding charge to verify the card. :::
6. Complete Card Verification
Depending on your bank, you may need to complete 2FA verification:
- OTP via SMS or Email
- Bank app approval
- Enter the OTP on the popup screen and click Submit.
Once verified, the status will show as Card Approved.
7. Set Card as Default
After adding the card successfully:
- Go to Billing & Payments > Payment Methods > WhatsApp Business Account.
- Check that the newly added card is visible.
- Click Set as Default.
Setting a primary card prevents service interruption during automatic billing cycles.
8. Confirm Payment Status
- Review the status under Payment Methods.
- Confirm the card displays:
- Status: Active / Primary
- Type: Credit / Debit
Your payment setup for WhatsApp Business Account is now complete!
Quick Troubleshooting
"Add Payment Method" Button Unavailable
- Check if your account has sufficient admin permissions.
- Ensure your business account is not flagged or restricted by Meta.
WhatsApp Account Not Showing
- Verify you are logged into the correct Meta Business Account.
- Check if your WhatsApp Business Account (WABA) is properly linked.
- Ensure you have Admin access to the WhatsApp Business Account itself.
Card Declined / Rejected
- Check with your bank whether international/online transactions are enabled.
- Verify card balance and expiration date.
- Ensure CVV code entered is correct.